1. Idea
2. Requirements
3. Conditions
4. Planning
5. Efforts
5a. in time
5b. financially
6. Realization
6a. Preparations
6b. Digging!
6c. Cut pipe to length and insert empty tubes
6d. Concrete the foundation
6e. Concreting the pier
6f. Floor
6g. Walls
6h. Roof
6i. Electrics
6j. IT
6k. Optics
6l. Remaining works
7. Lessons Learned
1. Idea
Every hobby astronomer knows this. You drag your equipment into the garden, comment loudly on one or the other misstep or stumble, dislocate pretty much every available bone and muscle because of the tens of kilograms which are moved, level the tripod, adjust the mount, balance optics and counterweights, colimate the hopefully sufficiently tempered equipment, connect cameras and focus them, start the computer, start the autoguiding and after 30 to 60 minutes (dependence on the goodwill of the technology) you are ready for action to see the sky, which by the intervening rise of fog, clouds or other unruly nastinesses (benevolent playing along of the technology) operationally ready around the sky, which shows itself by intermediate elevator of fog, clouds or other stubborn nastiness unanalytically whether the forthcoming observation night, by curses and fist show its displeasure to express and everything again nicely to dismantle, to drag and stow away. Clear. Again at least 30 minutes wasted. Thus one comes on minimum 60 minutes employment time with zero countable result. This happened to me in the period November to February 15 (in words: fifteen) times.
There had to be another solution. One where you could get started quickly and do so without affecting the body too much. Reproducible results and the shadowing of the street lighting are mentioned here as further arguments. So: An own backyard observatory. At least a column as a beginning, which can be expanded later with a backyard observatory, if one then still indulges in this hobby.
] Planung
2. Requirements
It has to be affordable, i.e. simple in construction and yet meet the higher requirements compared to normal garden sheds. Solid (foundation and walls) and massive, but also not too heavy (especially the retractable roof). It should fit discreetly and beautifully into the garden and not dominate it. All-weather resistant to storms, rain, snow and blazing summer sun. Burglar-proof would still be important (solid door without glass and no windows, alarm system) and sufficiently dimensioned. With sufficient height not to be blinded by streetlights, yet not too high to reach enough sky. Sufficient lighting (red light and "normal" light), electrical connections (cross-switching light switches, sufficient sockets with 230 volts, sufficient 12V connections and of course plenty of USB connections from the telescope to the PC workstation. Oh yes, a small storage space and some 24" monitors on the wall for monitoring the results are also needed. The list keeps growing and growing.
3. Conditions of the garden
a) In the west a fir tree as tall as a house and behind it the light bell of Munich Airport.
b) In the north the residential building, but free view to Polaris is available.
c) In the east, two street lamps with (still) white light and a clear view from about 20°. Although one lantern no longer plays a role due to a clever choice of location.
d) In the south from about 25° onwards visibility.
Thus, the location would be on the western property line, since the west is already lost anyway, with orientation to the south (that's where most of the action is). The now found location is my parents-in-law's tomato, lettuce and other greenery bed, which was released with uncomprehending head shaking when I announced my intention.
[ Status quo
4. Planning
So how do you plan a garden observatory? You don't do that every day, do you? First, diligently googled, browsed forums, asked others and read, read, read. As a minimum dimension everywhere 2m length and/or width are indicated. Better 2.5m. More is supposedly not needed. My calculations showed the same. So the base area will be a square with a side length (inside) of 2.5 meters. Okay. That's it. But there are two more essential questions to be answered: which pier and which roof?
 Rough Planning
The Pier
Here we distinguish between two variants, which have become established. Firstly, a concrete pier, secondly, a steel pier. Both require a sufficient concrete foundation, which I consider more than adequately dimensioned with 100*80*80cm.
A drain pipe (so-called KG pipe) with a sufficient diameter (250mm in my case) serves as formwork and is shortened to the right length and then provided with four opposite holes at the bottom, into which threaded rods protruding outwards are pushed - which helps stability - as well as with a hole at the top and bottom for an empty pipe, into which the cables will later come. This pipe is inserted into the previously excavated hole, into which spacers and an iron grid are placed at a height of 10cm above the ground. Vertical iron bars projecting from this grid into the inside of the pipe reinforce the whole. The spirit level is used to keep the vertical alignment very precise at all times until the concrete has hardened. Now the hole is filled with concrete, about 40 cm high. Then check the plumb again and wait until the concrete has set. Then fill the rest up to approx. 10 cm below the ground edge (do not forget to compact!). Later, soil or gravel and base plates will be placed on top of this and you will no longer see anything of the underground block. Last but not least, the pipe is filled up with concrete, and this is done with constant compaction. Now the previously organised concrete column adapter and end plate are placed vertically in the still soft concrete and the azimuth cone is aligned precisely to the north using a compass. DO NOT USE YOUR SMARTPHONE FOR THIS! It is too inacurate! Make sure that the adapter is exactly levelled on the concrete column with a spirit level. Later, it can be easily readjusted by means of the threaded screws. During the drying process, always check the correct alignment and correct it if necessary.
ii. Steel Pier
A prefabricated steel piers drilled onto the concrete foundation, filled with sand if necessary and closed at the top end by means of an adapter as described earlier.
I have opted for the first variant. The reasons are cost and flexibility. And yes, since you can also paint the unsightly dark orange white, optical flexibility as well.
The Roof
The interesting and difficult thing about a backyard observatory is the roof. Unlike common garden sheds, it does not have a rigid roof, but a flexible one that can open. Here, too, there are different variants. Roll-up roof (the roof together with the gable runs on two cantilevers and can thus be opened or closed), dome (probably the best-known variant, in which an almost spherical (usually white) rotating structure with a dome gap is enthroned on a substructure) and the folding roof variant.
i. Roll-Off Roof
Roll-Off Gable Roof
It looks like a garden house with a roof ridge. All that's missing are the geraniums.
Roll-Off Flat Roof
Not a gable but a surface with a slope. Lighter than the rolled gable variant.
ii. Domes
Domes are expensive, easily snagged and rising air penetrates through the relatively narrow dome gap to the outside. And it is precisely at this point that you look through the telescope into infinite space. Flickering (the so-called seeing) is unavoidable. Next!
iii. Folding Roof
A version in which the halves of the roof can be opened. Partly also the front sides of the observatory. Does it close like that? I don't really know. It's a big lever, after all. We should bury the folding chair... er, the folding roof version!
This also answers the question of which roof to choose. And the winner is: The roll-off flat roof!
5. Efforts
"Nothing comes from nothing." This small but wise saying applies to this project in particular. Two factors have to be taken into account. Time and money.
5a. Time Effort
Of course, you want to get to your long-awaited observatory as quickly as possible. But good things take time (and money). The best time for such a project is from spring to autumn. That's exactly how it is with me. You need the most important thing first: the pier. So you dig in good time so as not to be pressed for time. I planned three weekends for digging the hole, starting in mid-April (it's still a cubic metre of unknown soil). Then another two days for preparing the pipe and the iron cage, the empty pipes etc. pp. Then the whole thing will be filled with concrete - another day, so all in all a loose month. So mid-May. Then there will be a break, followed by the straightening of the ground outside, where the observatory is to be, and the filling in with gravel and paving. Then the laying of the power line, connecting it and laying the USB cables. So we're in the middle of June. Then we can enjoy it all for a while. My favourite carpenter has time for the house at the beginning of autumn, so at the beginning of September. I reckon with four weekends of construction. Then at the beginning of October the last work in the observatory, so that I will be finished in the middle of October - after 6 months of building. Insh Allah...
5b. Costs
I estimated about 600 euros for the pier. (KG pipe 70 euros, adapter plate on top 230 euros, concrete delivery (yes, I'm lazy!) with minimum quantity surcharge 200 euros, small stuff about another 100 euros.
I estimate 400 euros for levelling, gravel and slabs.
Subtotal: 1,000 euros
The shed itself will cost a lot more - anything from 2,000 to 4,000 euros is possible. Total costs: 3,000 - 6,000 euros. All-inclusive.
Result: Six months and 5,000 euros.
6. Realization
6a. Preparations
Here it is particularly important to communicate with others, to obtain permission (internally), and to inform all fellow residents about the project in order not to be faced with unpleasant surprises.
6b. Digging!
Here we go! As announced, enough time has to be included here. The groundbreaking ceremony took place on 14 April 2012 at 14:01 and 56 seconds.
 The Groundbreaking Ceremony
Finished Digging
As a desk jockey, you first have to get used to physical work again. It's better to start slowly but persevere. Whenever you get the chance: get out and dig! That reduces the total time considerably and the body gets used to it more quickly. At first your back will squeal and your muscles will curse you, but that will pass. See below for proof photos. Completion of the hole: 29.04.2012.
 Now where is he?
Cut Pipe to Length and Insert Empty Tubes
Here you can make a huge error in estimating the total length.
The following calculation applied to me: Currently, the mounting head of my NEQ6 rests on the tripod at a height of 73cm. So that is the desired height. I am now 80cm deep in the hole, whoops, how long does the tube have to be? The following calculation:
Hole depth: 80cm
Floor structure: 10cm
End plate, adapter plate and threaded rods: total 22cm
So 73cm - 22cm + 10cm + 80cm = well? Correct, the tube needs a total length of 141cm. Good Master Matthias, do your job! Cut it to length!

Matthias and the Flex - a symbiosis
Since I don't want to have a tangle of cables outside, I lay the cables inside. So first of all, I have to think carefully about where the electricity has to come in (logically at the bottom), where it has to go out (just above the floor to have an external socket at the base of the column), and finally where it has to be provided with sockets and in what number (under the adapter plate at the top end of the tube). And since I also want to connect the devices on and around the column with my computer in the corner, empty tubes for the USB connection will be pulled in at the same time. Matthias had suitable iron cages for the inside of the tube, so we first installed everything nicely and put three iron rods at the foot of the tube, which stand crosswise and protrude outwards about 10cm each, which increases the stability. It looks like this:
6d. Concrete the foundation
Matthias had a long iron basket, which we shortened into four roughly equal parts and stuck into the corners as reinforcement By nature rather organised (others say lazy) I decided to have the concrete delivered by the local concrete plant. Yes, I know, lazy. But I absolutely had to fill the hole again, because (quote) "someone could fall in". All sorts of things were mentioned, even turtles. Turtles... aaaah yes!.. So on the same day the concrete arrived (a total of one cubic metre, the equivalent of 2,500 kg!!!), which was transported in wheelbarrows to the place of destination and lowered.

The foundation is concreted
e) Concreting the pier
The pier was concreted along with the foundation to the same extent. After everything was emptied, we used two long beams and two shorter ones as scaffolding to stabilise the column in its position. The adapter plate was concreted in at the same time, the azimuth pin, which should point very precisely to the north, was aligned by compass, the position of the column was precisely aligned by spirit level, vertically (column) as well as horizontally (end plate) the final position of the garden column was fixed precisely.

Concreting the pier

Matthias - without him none of this would have happened the way it did. Thank you!
Points c -e were completed within six hours thanks to the immense help of my good friend and neighbour Matthias. He had ideas, he lent a hand, craftsmanship at its best. Matthias, thank you for your dedication and help! Without you, I wouldn't have been able to do it so quickly and so well. You need neighbours like that!!!
This is what the pier looks like now:

The pier - (almost) finished!

Closeup
f) 6f. Floor
Friday, 18 May 2012
So, on we go. In the meantime, I have already taken the first pictures. Nothing wobbles, everything is stable, and I apparently got the alignment with Polaris right when I set the concrete. I only had to adjust it by about 2°, which is fine.
Now it's time for the next round - the spot foundations have to be laid. The observatory will rest on these. So dig again, 80 deep with a 30 mm diameter. Come on, stop it! I'm getting tired of digging. How am I supposed to get almost a metre deep in the concrete floor in a hole that is only 30 cm wide?
Broooooooding... Hmmmmhmmm...
 But yes, I've got it! That's the idea! I felt like the little viking with the much too big head. "Earth auger! Rent an earth auger!" it thought and set to work. I made a reservation at Verleihnix in Munich for 8 a.m. today (bridge day). That meant getting up at 6 so that I would be there on time. Passing the Allianzarena, where the name on the outside had been replaced by "UEFA Champions League", I raised my clenched fist in greeting to the FCB. "PACK MA's, BUAM!" I commented on the upcoming "Dahoam final" and picked up the drill. Two Leberkässemmeln and an hour later I was home. A two-stroke, which was supposed to drill 80cm deep holes with a 15cm diameter. And that in my hands. Guys, this is turning me into a weapon. I went through the list of my most beloved people again. With a "Forget it dude, I don't have enough fuel for that" I left it at that. But there's something...
Prrreeeeetpetpetpet it started, the auger. With me. Or I with him? No matter. The first holes were quickly dug to a depth of 40 cm. Full of frustration because of the internal combustion engine, which roared charmingly at a perceived 130dBA, my father-in-law's 14-week-old "dog" fired the metal spigot through his dwelling, howling and clattering. Magnificent, this ambience. I already had another title for this blog in my brain box: Mad Max - and the Auger!

The saving thought: a soil auger!
But then the fence side. Seriously? Is there a Führerbunker under there that I don't know about? Erding's pyramids even? (Built upside down, of course?) No idea. The ground was as hard as concrete, and in addition also criss-crossed by the stupid fir tree with plenty of roots. Matthias, who in the meantime appeared quite hungover because of the celebration of yesterday's Father's Day, helped me.
At 1 pm we were done. But we were done and done. We disposed of the soil, cleaned the tools and that was that. That's how it looks at the moment:

The foundations are ready for the concrete
Monday, 13. August 2012 - 07:30 h
So today is the day, the observatory is coming! My carpenter Thomas arrived on time at the construction site and had loaded the observatory onto his trailer.

Monday, 13 August 2012 07: 30 - here we go!
Everything was initially spread out in the garden. The observatory rests on the ground, so it needs excellent stability. Thomas' basic construction was screwed to the point foundations with anchors and filled with gravel, which was delivered much too late, and then finished with roofing felt and OSB boards. My buddy Lars had a brilliant idea. Normally you pour the gravel in a strip of about 30cm around the hut. But this would have meant a lot of work: setting kerbstones. Lars thought that one could simply use Bankirai Wood at the base, which would thus serve as an apron and save this effort. No sooner said than done.

Master Lars and the floor

2,000 screws were used in the construction. The OSB floor and the Bankirai apron.
Then we had a snack. It was already 11 o'clock and the ladies had earned it. I contributed to the amusement with my camping chair acrobatics... Haha...

The Camping Chair Massacre!
g) 6g. Walls
Now things went very quickly. The individual wall segments had already been prepared by Thomas and could thus be erected quickly. Putting up the walls only took about 90 minutes.
The walls consist of OSB panels on the inside, around which 5 cm thick beams form the frame construction. Air is known to be a good insulator. That's why I didn't use any polystyrene or other filling materials. When you are on such a well-functioning building site, the individual departments (construction and electrics) consult each other directly and drill holes in the beams for the empty conduits of the electrics and the flush-mounted sockets. Once all this is done, tongue and groove boards are screwed onto the frames.

Hermann and Matthias - the best neighbours you can have!
h) Roof
I wanted a flat roof. I just didn't want the look of a garden shed. There is already one of these in the garden. So Thomas chose a flat roof variant with a 5° pitch, which was to be insulated against strong sunlight with natural insulating material (panels about 7 cm thick). On top of this came a counter-battening and the roof made of a kind of corrugated sheet metal, which protrudes about 15cm on the sloping side to let the rainwater run down a little away from the observatory. The frame alone was very heavy, so that all five people present had to help lift it.

Heave ho!
After the roof had been lifted, it was further worked on with the insulation and sheet metal work just mentioned. Since it had now gained a lot of weight, it was no longer easy to move with one finger. You have to push or pull it quite a bit to move it.
At the end of the first day, the emerging observatory looked like this:

End of day 1 - the shell is finished.
i) 6i. Electrics
Lars and I were still busy until 0:30 in the morning inside the observatory, laying cables, placing boxes and fixing the empty pipes with cable ties and screws to the outside of the OSB boards, so that Thomas, the carpenter, could start planking with tongue and groove boards the next day.
[
Reminder photo, in case something should happen and you have to reach the cables.
How could it be otherwise than that Larsi had another brilliant idea. Normally one uses 230 volts. But some devices like the mount, cameras, focusers and other stuff need 12V. I already had an extra 12V power supply. So Lars thought he could use the main power line in the observatory (230V) and the power supply to feed in an additional 12V and thus get rid of annoying additional cables. To do this, he used a 5-core power cable and converted the power supply unit accordingly. Perfect!
When it came to lighting, I first thought of LED lighting. My friend Armin works for an electrical wholesale company and provided me not only with material but also with appropriate catalogues on the subject of LEDs. Take your pick, he said. Lars and I browsed. Some fine things there! Suma sumarum, however, spending 300 euros just for red and white light was too much of a good thing, and so we ended up with four DIY store lamps for the cellar at four euros a piece. Does just as well as LED. Ha!
j) IT
Of course I wanted a PC to control the mount and take pictures. So I bought an old computer from my employer for little money, put Windows 7 on it and all the other programmes I needed. ASCOM, Backyard EOS, Stellarium and PHD Guiding. The whole thing was to run on two 24″ TFTs, which I bought on special offer from Aldi in June. These TFT's are mounted on top of each other in the IT corner of the control room using wall brackets, can be swivelled and are very space-saving. The best thing is that everything works.

Scotch me up, Beamie!
Since I wanted to avoid cable tangles and tripping hazards at all costs, Matthias and I already thought of an empty tube for the USB cable when concreting the column, through which an active cable should run from the HUB on the column to the IT corner. So. Now this cable came and was of course - too thick at the connector. Lars came with a pair of pliers and... he did it!!! Snap, it was off. Hermann and Lars pulled the neutered cable through the empty tube. When it was through, Lars soldered everything back on with a lot of dexterity. Fits. The disappointment came later, because Win 7 reported that it would be advantageous if the devices were connected to a USB 2.0 distributor. Eh? What 2.0? I got 2.0! Look! There! It says 1.1 on the package... shiiii....!!!! There's always something, but in the meantime I'm helping myself with a USB 2.0 extension cable, which runs from the column to the PC on the floor. Lars has already found a suitable cable with a mini plug, which is still to come.
k) Optics
My optics were now fixed. They were to be the Vixen VMC200L and the Orion ED80 (Einstein and Dante). So before I moved them into the observatory, I gave them a treat and took them to the optics guru Mr Rohr in Hassfurt last Thursday. The trip of 700km should pay off, because if then right. The optics are both in order, and thanks to many ideas from my astro friends Michael, Christian and a few others in my circle of influence in the Forum Stellarum a solution was quickly found to "marry" the two - by piggyback. Ralf Mündlein he also gave me some valuable tips during a memorable evening in Franconia, where I was allowed to meet my astro friends for the first time and fell off the wagon in Ralf's super observatory about what is possible and what a few wheat beers can do, right Uwe? 😉

Frithjof (8″ ACF) and Galileo (TOA 130) on the EQ8
Another problem emerged, which is not entirely without its difficulties. When planning the observatory, I assumed that my 8″ Newton would be used and dimensioned the concrete column according to the expected useful height. With the Newton, you look into the telescope relatively close to the tube opening. So that's ok, it has a length of one metre. But now I use other equipment where you look into the optics at the end, and they are also much shorter. So the column is too short to look sufficiently to the south, where exciting objects can be observed in summer (Trifid and Eagle Nebula) and in winter Orion with your nebula of the same name as well as Horsehead and co. are waiting. Bummer. But there will be a solution for that too.
Now all I have to do is balance them perfectly, make them shine and bring them into congruence, then that's done too. But one also needs something to do for the time between the speckle evenings
l) 6l. Remaining works
Wednesday and Thursday were a lot of painting. Thanks to a brilliant idea from my albireo, I decided on white as the main colour and blue for the accents. My lovely daughter helped me with the painting with scorching help, without grumbling or grumbling. Luckily, it's the big holidays. With a lot of discipline and dedication she helped the observatory to its visual final stage, using 5l of white and 1,5l of blue paint. Thank you mouse!
Earth around an observatory is of course suboptimal. That's why I sowed grass. I've done it a thousand times. Laugh. Never ever! The seed packaging said to sow in a cross shape. Mhmmmm. I'll do it. Then I dribble over it to get the seed into the soil. Also ok. But watering every 2 hours at over 30°C is really tough. And when will this stuff ever open up? We'll see. I took three perennials of Chinese reed from the front garden and dug them in. And the hammer was of course brought by Matthias and his family. I asked where they got their thujas. He said, that's a tree of life, man! I don't care. His sweetheart Vroni said I could take the one at the corner of the house right away. What? Just like that? Sure! Wow! And already I had a thuj... ahem, a tree of life to the observatory.
Without my friends and neighbours, none of this would have been possible. Matthias alone has repeatedly sacrificed his free time, on Monday even a complete day of holiday, to help me. Lars drove all the way from Biberach to help me, a true hunting wolf! Hermann was also always happy to help, thanks to the good Maxlreiner beer, and my carpenter Thomas, who put my ideas into practice too wonderfully, is also without equal. Michael from Erlangen also always gave me helpful tips, and Christian was also a valuable source of information!
THANK YOU ALL FROM THE BOTTOM OF MY HEART!
Thus, the observatory, which bears the name of Paul Stephani Observatorium (after my dear grandfather, who got me started in astronomy when I was five).
Here it is in full glory after 80 hours of work (2012):

The Paul Stephani Observatory (PSO)
And this is how it looks after eleven years of operation (2023):
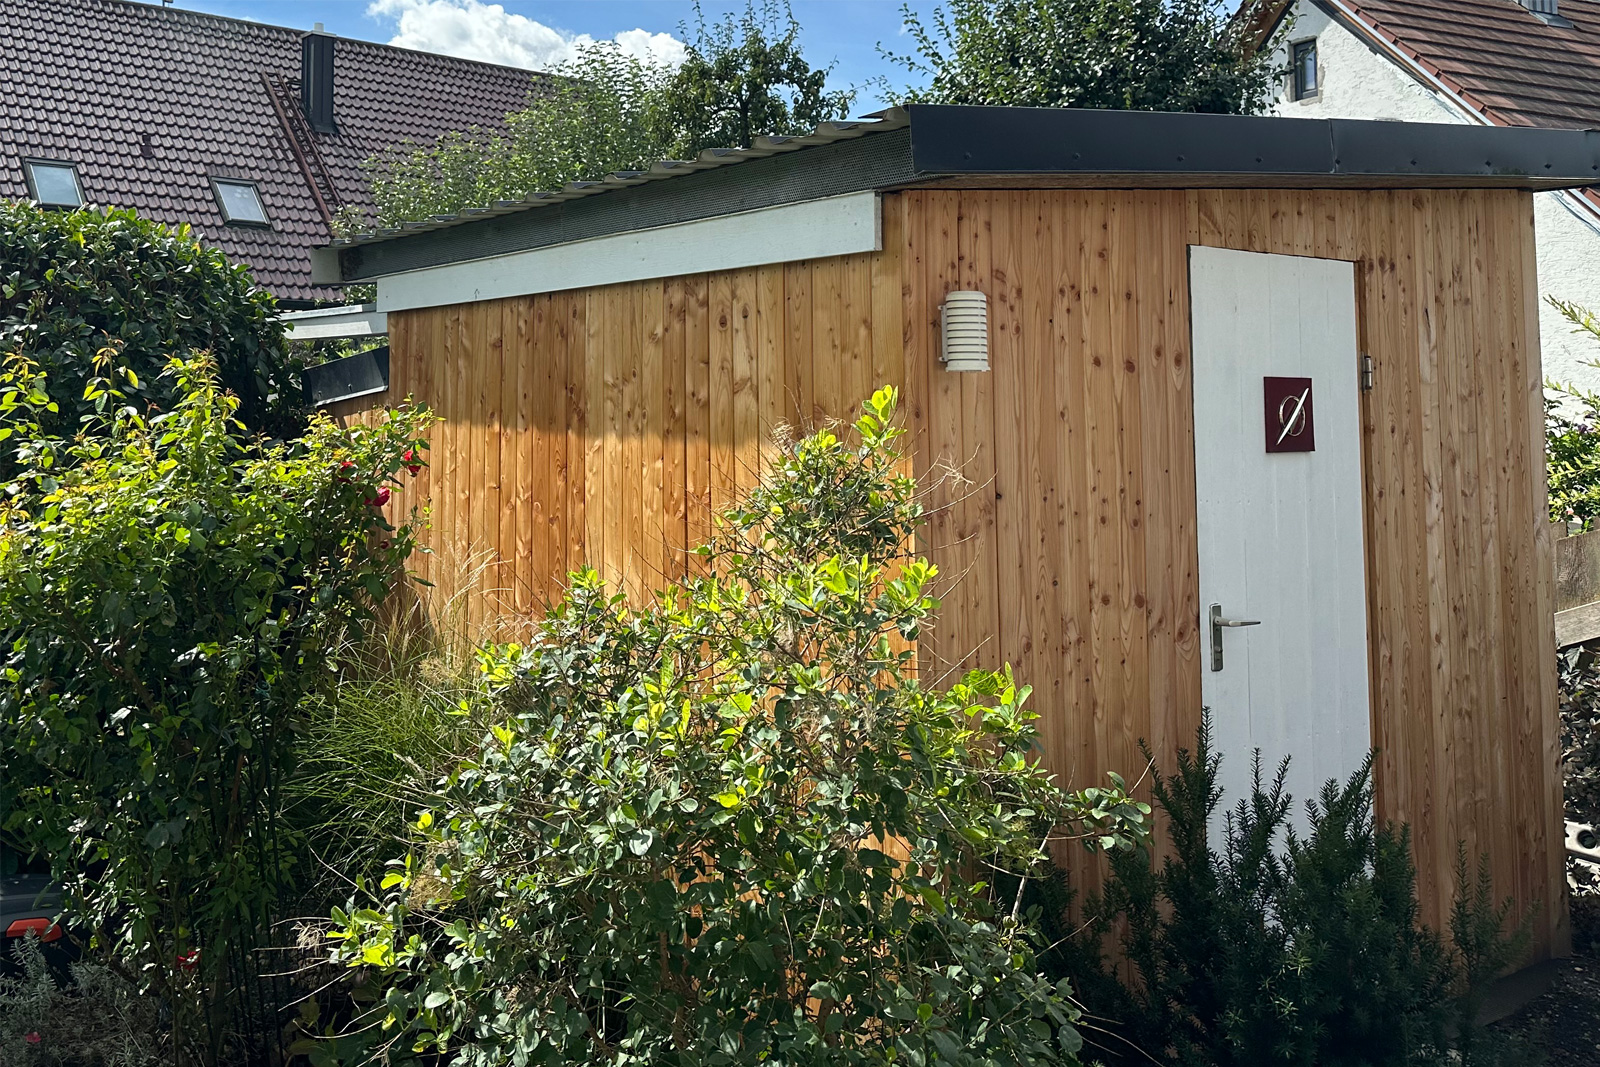 „as time goes by…“
7. Tips and Lessons Learned
1. start planning in good time
2. read, ask, understand!
3. ensure financial flexibility
4. take your time and don't rush things
5. ask the building authority whether a permit is required (it was not the case for me).
6. generously dimension the pier and the foundation
7. inform the neighbours what you are up to. Calms them down immensely
8. plan the pier high enough
9. organise sufficient assistants
10. leave electrical reserves (sockets etc.)
and last but not least:
LOOK FORWARD TO THE RESULT!


")


